搜索到
28
篇与
的结果
-
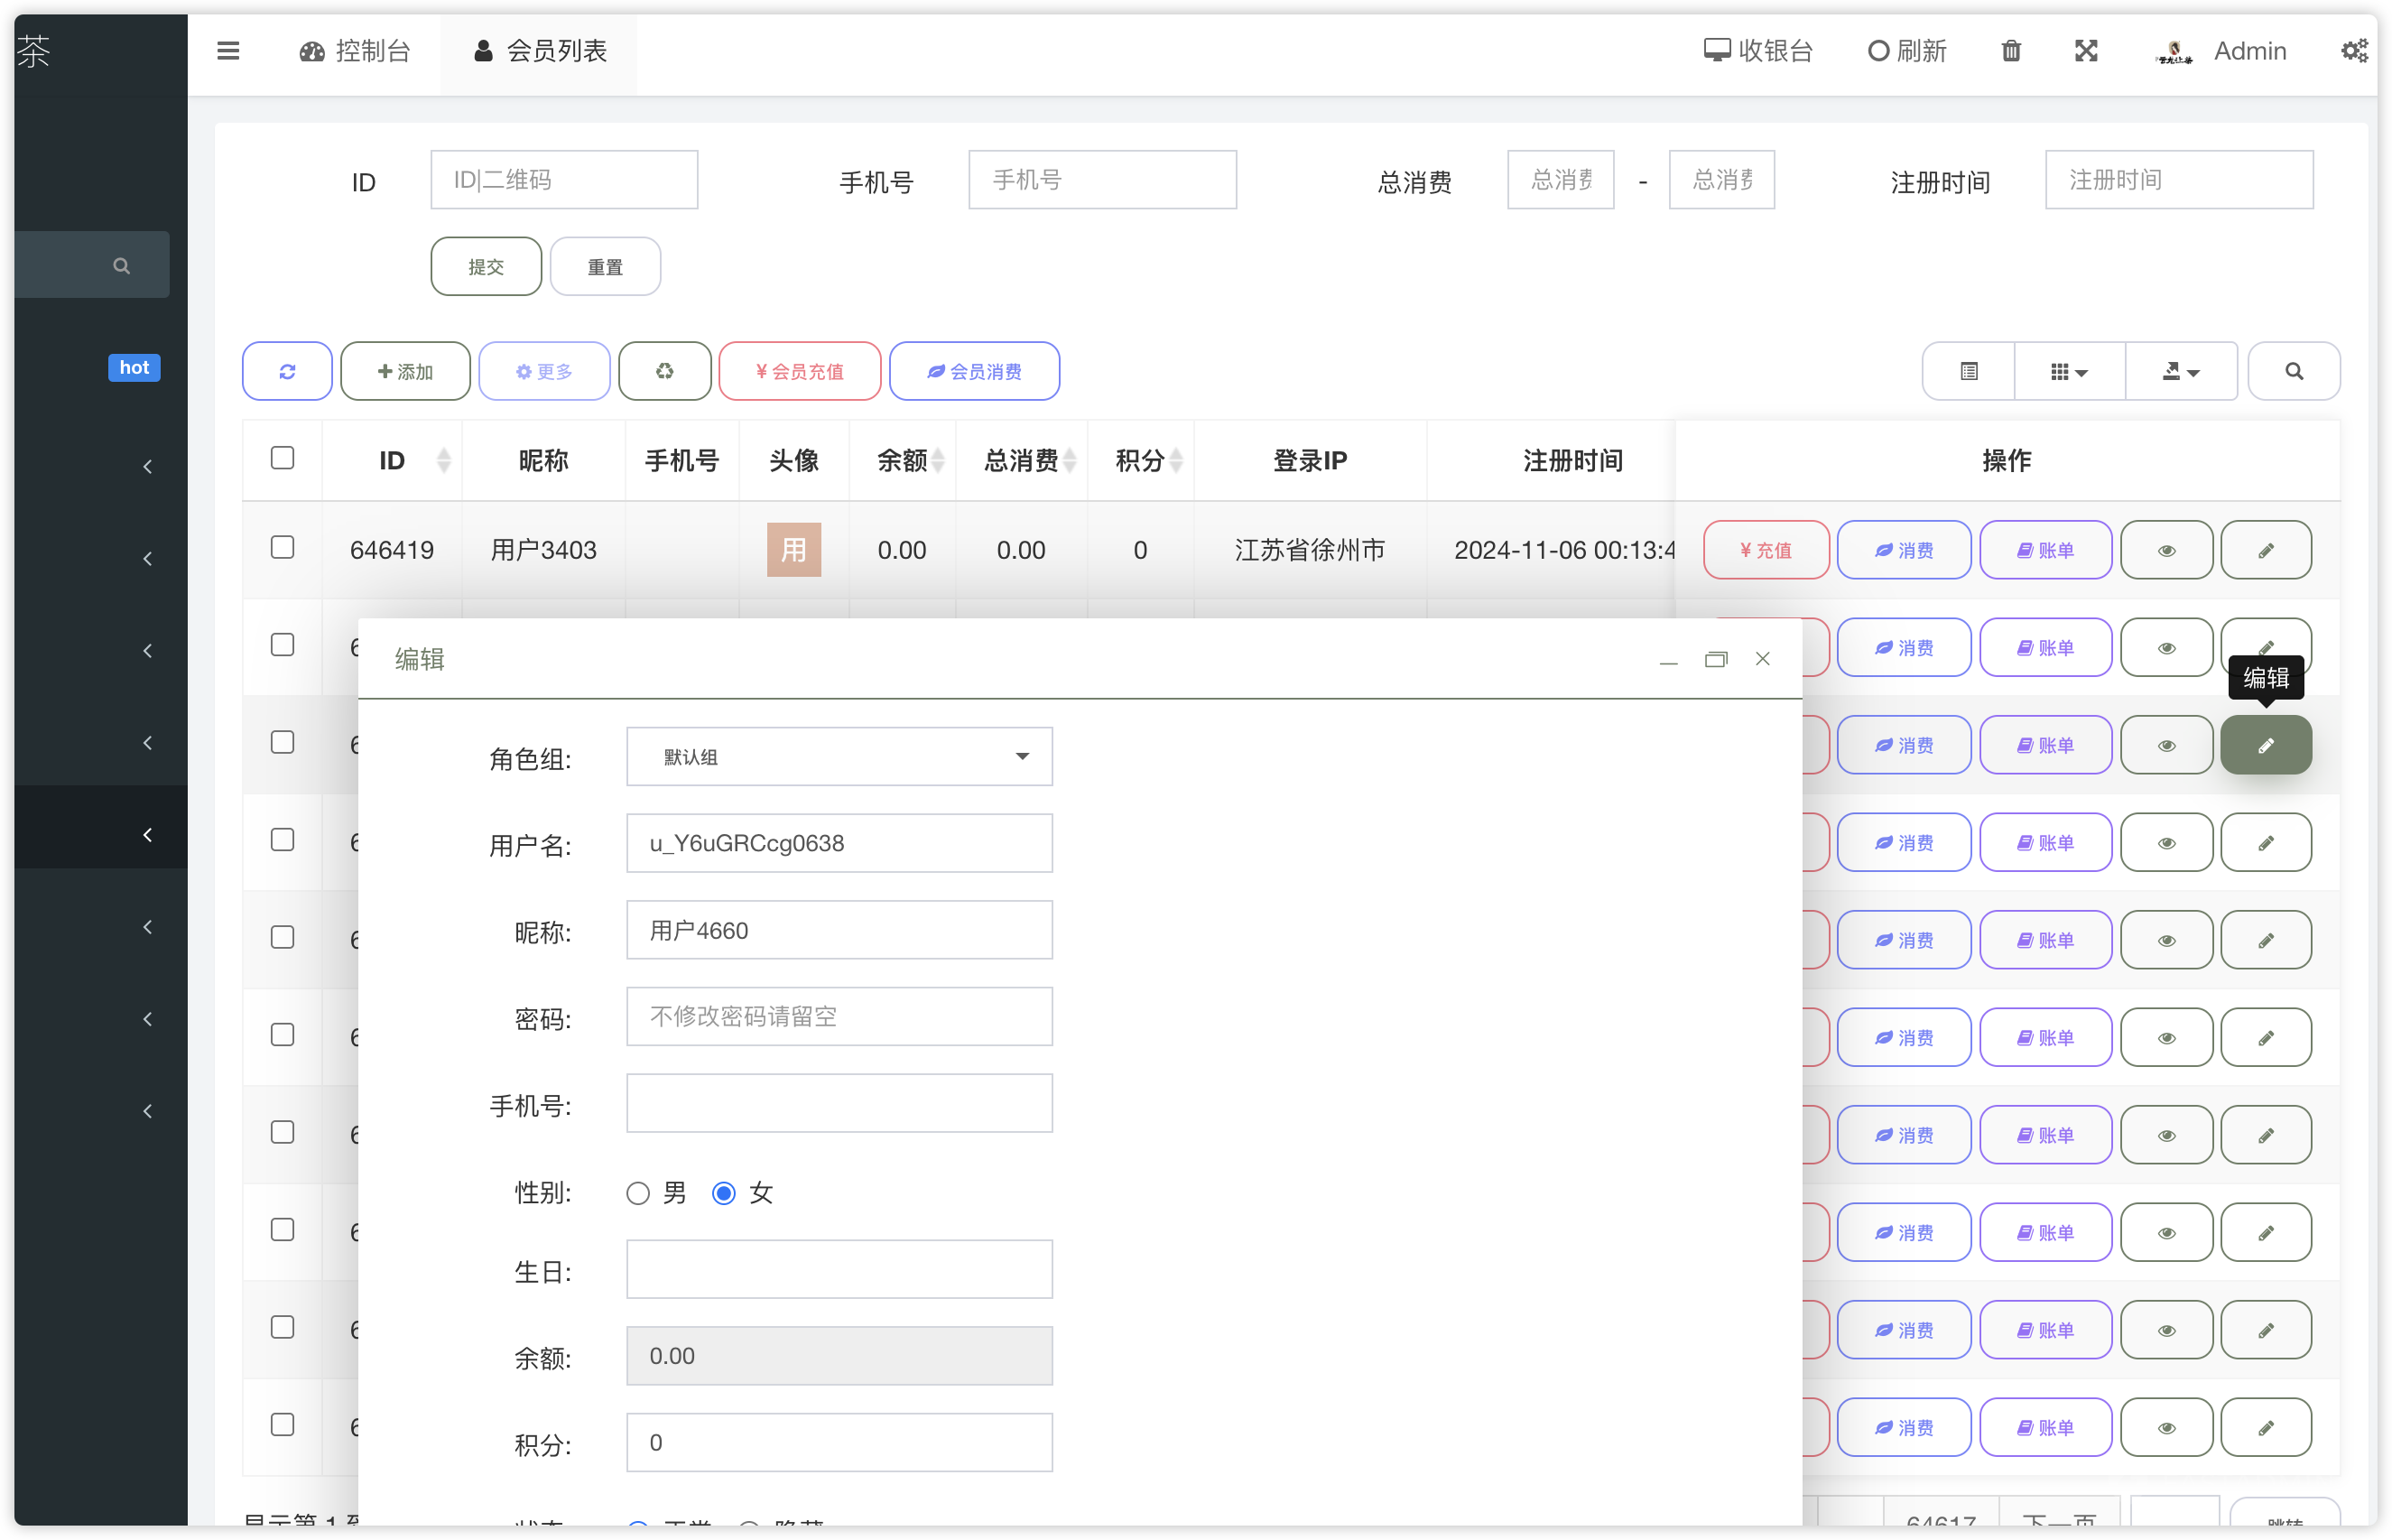
![Fastadmin 美化后台样式]() Fastadmin 美化后台样式 0. 前言前几天有人问我怎么修改后台框架样式,我给他找到了 统一修改后台命令行生成的样式 这篇文章,但是朋友说介绍的不是很明白,于是这里参考这篇文章的思路简单扩展一下。1. 新建自定义样式首选确保你在debug模式下在 public/assets/css 目录下新建一个自定义的css文件,用于修改你想要的样式。比如我命名custom-guooo.css。这里的样式我只抛砖引玉,你也可以自行发挥,代码如下:.btn { display: inline-block; line-height: 1.5; color: #212529; text-align: center; text-decoration: none; vertical-align: middle; cursor: pointer; -webkit-user-select: none; -moz-user-select: none; -ms-user-select: none; user-select: none; background-color: transparent; border: 1px solid transparent; font-size: 1rem; transition: color .15s ease-in-out,background-color .15s ease-in-out,border-color .15s ease-in-out,box-shadow .15s ease-in-out; padding: 8px 20px; border-radius: 10px; font-weight: 500; } .btn-primary { color: #7888fc; border-color: #7888fc } .btn-primary.focus,.btn-primary:focus,.btn-primary:hover,.btn-primary:not(:disabled):not(.disabled).active,.btn-primary:not(:disabled):not(.disabled):active { color: #fff; border-color: #7888fc; background-color: #7888fc; box-shadow: 0 7px 23px -8px #7888fc } .btn-secondary { color: #5b5b5b; border-color: #e4e6ef } .btn-secondary.focus,.btn-secondary:focus,.btn-secondary:hover,.btn-secondary:not(:disabled):not(.disabled).active,.btn-secondary:not(:disabled):not(.disabled):active { color: #5b5b5b; border-color: #e4e6ef; background-color: #e4e6ef; box-shadow: 0 7px 23px -8px #e4e6ef } .btn-success { color: #708069; border-color: #708069 } .btn-success.focus,.btn-success:focus,.btn-success:hover,.btn-success:not(:disabled):not(.disabled).active,.btn-success:not(:disabled):not(.disabled):active { color: #fff; border-color: #708069; background-color: #708069; box-shadow: 0 7px 23px -8px #708069 } .btn-danger { color: #f75d6fd8; border-color: #f75d6fd8 } .btn-danger.focus,.btn-danger:focus,.btn-danger:hover,.btn-danger:not(:disabled):not(.disabled).active,.btn-danger:not(:disabled):not(.disabled):active { color: #fff; border-color: #f75d6fd8; background-color: #f75d6fd8; box-shadow: 0 7px 23px -8px #f75d6fd8 } .btn-warning { color: #f5af47ea; border-color: #f5af47ea } .btn-warning.focus,.btn-warning:focus,.btn-warning:hover,.btn-warning:not(:disabled):not(.disabled).active,.btn-warning:not(:disabled):not(.disabled):active { color: #fff; border-color: #f5af47ea; background-color: #f5af47ea; box-shadow: 0 7px 23px -8px #f5af47ea } .btn-info { color: #9465fcea; border-color: #9465fcea } .btn-info.focus,.btn-info:focus,.btn-info:hover,.btn-info:not(:disabled):not(.disabled).active,.btn-info:not(:disabled):not(.disabled):active { color: #fff; border-color: #9465fcea; background-color: #9465fcea; box-shadow: 0 7px 23px -8px #9465fcea } .btn-dark { color: #5b5b5b; border-color: #d1d3e0 } .btn-dark.focus,.btn-dark:focus,.btn-dark:hover,.btn-dark:not(:disabled):not(.disabled).active,.btn-dark:not(:disabled):not(.disabled):active { color: #5b5b5b; border-color: #d1d3e0; background-color: #d1d3e0; box-shadow: 0 7px 23px -8px #d1d3e0 } .btn-default { color: #5b5b5b; border-color: #d1d3e0 } .btn-default.focus,.btn-default:focus,.btn-default:hover,.btn-default:not(:disabled):not(.disabled).active,.btn-default:not(:disabled):not(.disabled):active { color: #5b5b5b; border-color: #d1d3e0; background-color: #d1d3e0; box-shadow: 0 7px 23px -8px #d1d3e0 }2. 引入自定义样式修改 public/assets/css/backend.css 文件(注意不要修改backend.min.css),在第15行左右加一行引入你的自定义文件@import url("../css/custom-guooo.css");,注意要确保是最后一个@import。引入之后你就可以刷新浏览器看一下样式是否生效了,记得提前清理浏览器缓存。3. 压缩打包后台的CSS修改了backend.css后还需要手动压缩后台css,命令行执行php think min -m backend -r css然后关闭调试模式,清理浏览器缓存后再次刷新,样式生效的话就可以了。至此就大功告成了其他如果你直接使用了上面的样式,可能后台的登录页按钮会有点奇怪,这个按钮强制定义了背景色为蓝色,你可以修改application/admin/view/index/login.html第135行左右的按钮为:<button type="submit" class="btn btn-primary btn-lg btn-block">{:__('Sign in')}</button>弹窗样式也是修改backend.css,效果图的样式是修改了下面这几个,有需要可以自行替换(修改后别忘了压缩打包).layui-layer-fast .layui-layer-btn a { background-color: #fff; color: #708069 !important; height: 32px; line-height: 32px; margin-top: 0; font-size: 13px; border: none; } .layui-layer-fast .layui-layer-btn .layui-layer-btn0 { background-color: #708069; color: #fff !important; border: #708069; } .layui-layer-fast .layui-layer-footer { padding: 8px 20px; background-color: #f5f5f5; height: auto; min-height: 53px; text-align: inherit !important; border-top: 1px solid #C0C0C0; } .layui-layer-fast .layui-layer-setwin > a:after { content: "\e625"; font-family: iconfont; font-style: normal; font-weight: normal; text-decoration: inherit; position: absolute; font-size: 18px; color: #708069; margin: 0; z-index: 1; }
Fastadmin 美化后台样式 0. 前言前几天有人问我怎么修改后台框架样式,我给他找到了 统一修改后台命令行生成的样式 这篇文章,但是朋友说介绍的不是很明白,于是这里参考这篇文章的思路简单扩展一下。1. 新建自定义样式首选确保你在debug模式下在 public/assets/css 目录下新建一个自定义的css文件,用于修改你想要的样式。比如我命名custom-guooo.css。这里的样式我只抛砖引玉,你也可以自行发挥,代码如下:.btn { display: inline-block; line-height: 1.5; color: #212529; text-align: center; text-decoration: none; vertical-align: middle; cursor: pointer; -webkit-user-select: none; -moz-user-select: none; -ms-user-select: none; user-select: none; background-color: transparent; border: 1px solid transparent; font-size: 1rem; transition: color .15s ease-in-out,background-color .15s ease-in-out,border-color .15s ease-in-out,box-shadow .15s ease-in-out; padding: 8px 20px; border-radius: 10px; font-weight: 500; } .btn-primary { color: #7888fc; border-color: #7888fc } .btn-primary.focus,.btn-primary:focus,.btn-primary:hover,.btn-primary:not(:disabled):not(.disabled).active,.btn-primary:not(:disabled):not(.disabled):active { color: #fff; border-color: #7888fc; background-color: #7888fc; box-shadow: 0 7px 23px -8px #7888fc } .btn-secondary { color: #5b5b5b; border-color: #e4e6ef } .btn-secondary.focus,.btn-secondary:focus,.btn-secondary:hover,.btn-secondary:not(:disabled):not(.disabled).active,.btn-secondary:not(:disabled):not(.disabled):active { color: #5b5b5b; border-color: #e4e6ef; background-color: #e4e6ef; box-shadow: 0 7px 23px -8px #e4e6ef } .btn-success { color: #708069; border-color: #708069 } .btn-success.focus,.btn-success:focus,.btn-success:hover,.btn-success:not(:disabled):not(.disabled).active,.btn-success:not(:disabled):not(.disabled):active { color: #fff; border-color: #708069; background-color: #708069; box-shadow: 0 7px 23px -8px #708069 } .btn-danger { color: #f75d6fd8; border-color: #f75d6fd8 } .btn-danger.focus,.btn-danger:focus,.btn-danger:hover,.btn-danger:not(:disabled):not(.disabled).active,.btn-danger:not(:disabled):not(.disabled):active { color: #fff; border-color: #f75d6fd8; background-color: #f75d6fd8; box-shadow: 0 7px 23px -8px #f75d6fd8 } .btn-warning { color: #f5af47ea; border-color: #f5af47ea } .btn-warning.focus,.btn-warning:focus,.btn-warning:hover,.btn-warning:not(:disabled):not(.disabled).active,.btn-warning:not(:disabled):not(.disabled):active { color: #fff; border-color: #f5af47ea; background-color: #f5af47ea; box-shadow: 0 7px 23px -8px #f5af47ea } .btn-info { color: #9465fcea; border-color: #9465fcea } .btn-info.focus,.btn-info:focus,.btn-info:hover,.btn-info:not(:disabled):not(.disabled).active,.btn-info:not(:disabled):not(.disabled):active { color: #fff; border-color: #9465fcea; background-color: #9465fcea; box-shadow: 0 7px 23px -8px #9465fcea } .btn-dark { color: #5b5b5b; border-color: #d1d3e0 } .btn-dark.focus,.btn-dark:focus,.btn-dark:hover,.btn-dark:not(:disabled):not(.disabled).active,.btn-dark:not(:disabled):not(.disabled):active { color: #5b5b5b; border-color: #d1d3e0; background-color: #d1d3e0; box-shadow: 0 7px 23px -8px #d1d3e0 } .btn-default { color: #5b5b5b; border-color: #d1d3e0 } .btn-default.focus,.btn-default:focus,.btn-default:hover,.btn-default:not(:disabled):not(.disabled).active,.btn-default:not(:disabled):not(.disabled):active { color: #5b5b5b; border-color: #d1d3e0; background-color: #d1d3e0; box-shadow: 0 7px 23px -8px #d1d3e0 }2. 引入自定义样式修改 public/assets/css/backend.css 文件(注意不要修改backend.min.css),在第15行左右加一行引入你的自定义文件@import url("../css/custom-guooo.css");,注意要确保是最后一个@import。引入之后你就可以刷新浏览器看一下样式是否生效了,记得提前清理浏览器缓存。3. 压缩打包后台的CSS修改了backend.css后还需要手动压缩后台css,命令行执行php think min -m backend -r css然后关闭调试模式,清理浏览器缓存后再次刷新,样式生效的话就可以了。至此就大功告成了其他如果你直接使用了上面的样式,可能后台的登录页按钮会有点奇怪,这个按钮强制定义了背景色为蓝色,你可以修改application/admin/view/index/login.html第135行左右的按钮为:<button type="submit" class="btn btn-primary btn-lg btn-block">{:__('Sign in')}</button>弹窗样式也是修改backend.css,效果图的样式是修改了下面这几个,有需要可以自行替换(修改后别忘了压缩打包).layui-layer-fast .layui-layer-btn a { background-color: #fff; color: #708069 !important; height: 32px; line-height: 32px; margin-top: 0; font-size: 13px; border: none; } .layui-layer-fast .layui-layer-btn .layui-layer-btn0 { background-color: #708069; color: #fff !important; border: #708069; } .layui-layer-fast .layui-layer-footer { padding: 8px 20px; background-color: #f5f5f5; height: auto; min-height: 53px; text-align: inherit !important; border-top: 1px solid #C0C0C0; } .layui-layer-fast .layui-layer-setwin > a:after { content: "\e625"; font-family: iconfont; font-style: normal; font-weight: normal; text-decoration: inherit; position: absolute; font-size: 18px; color: #708069; margin: 0; z-index: 1; } -
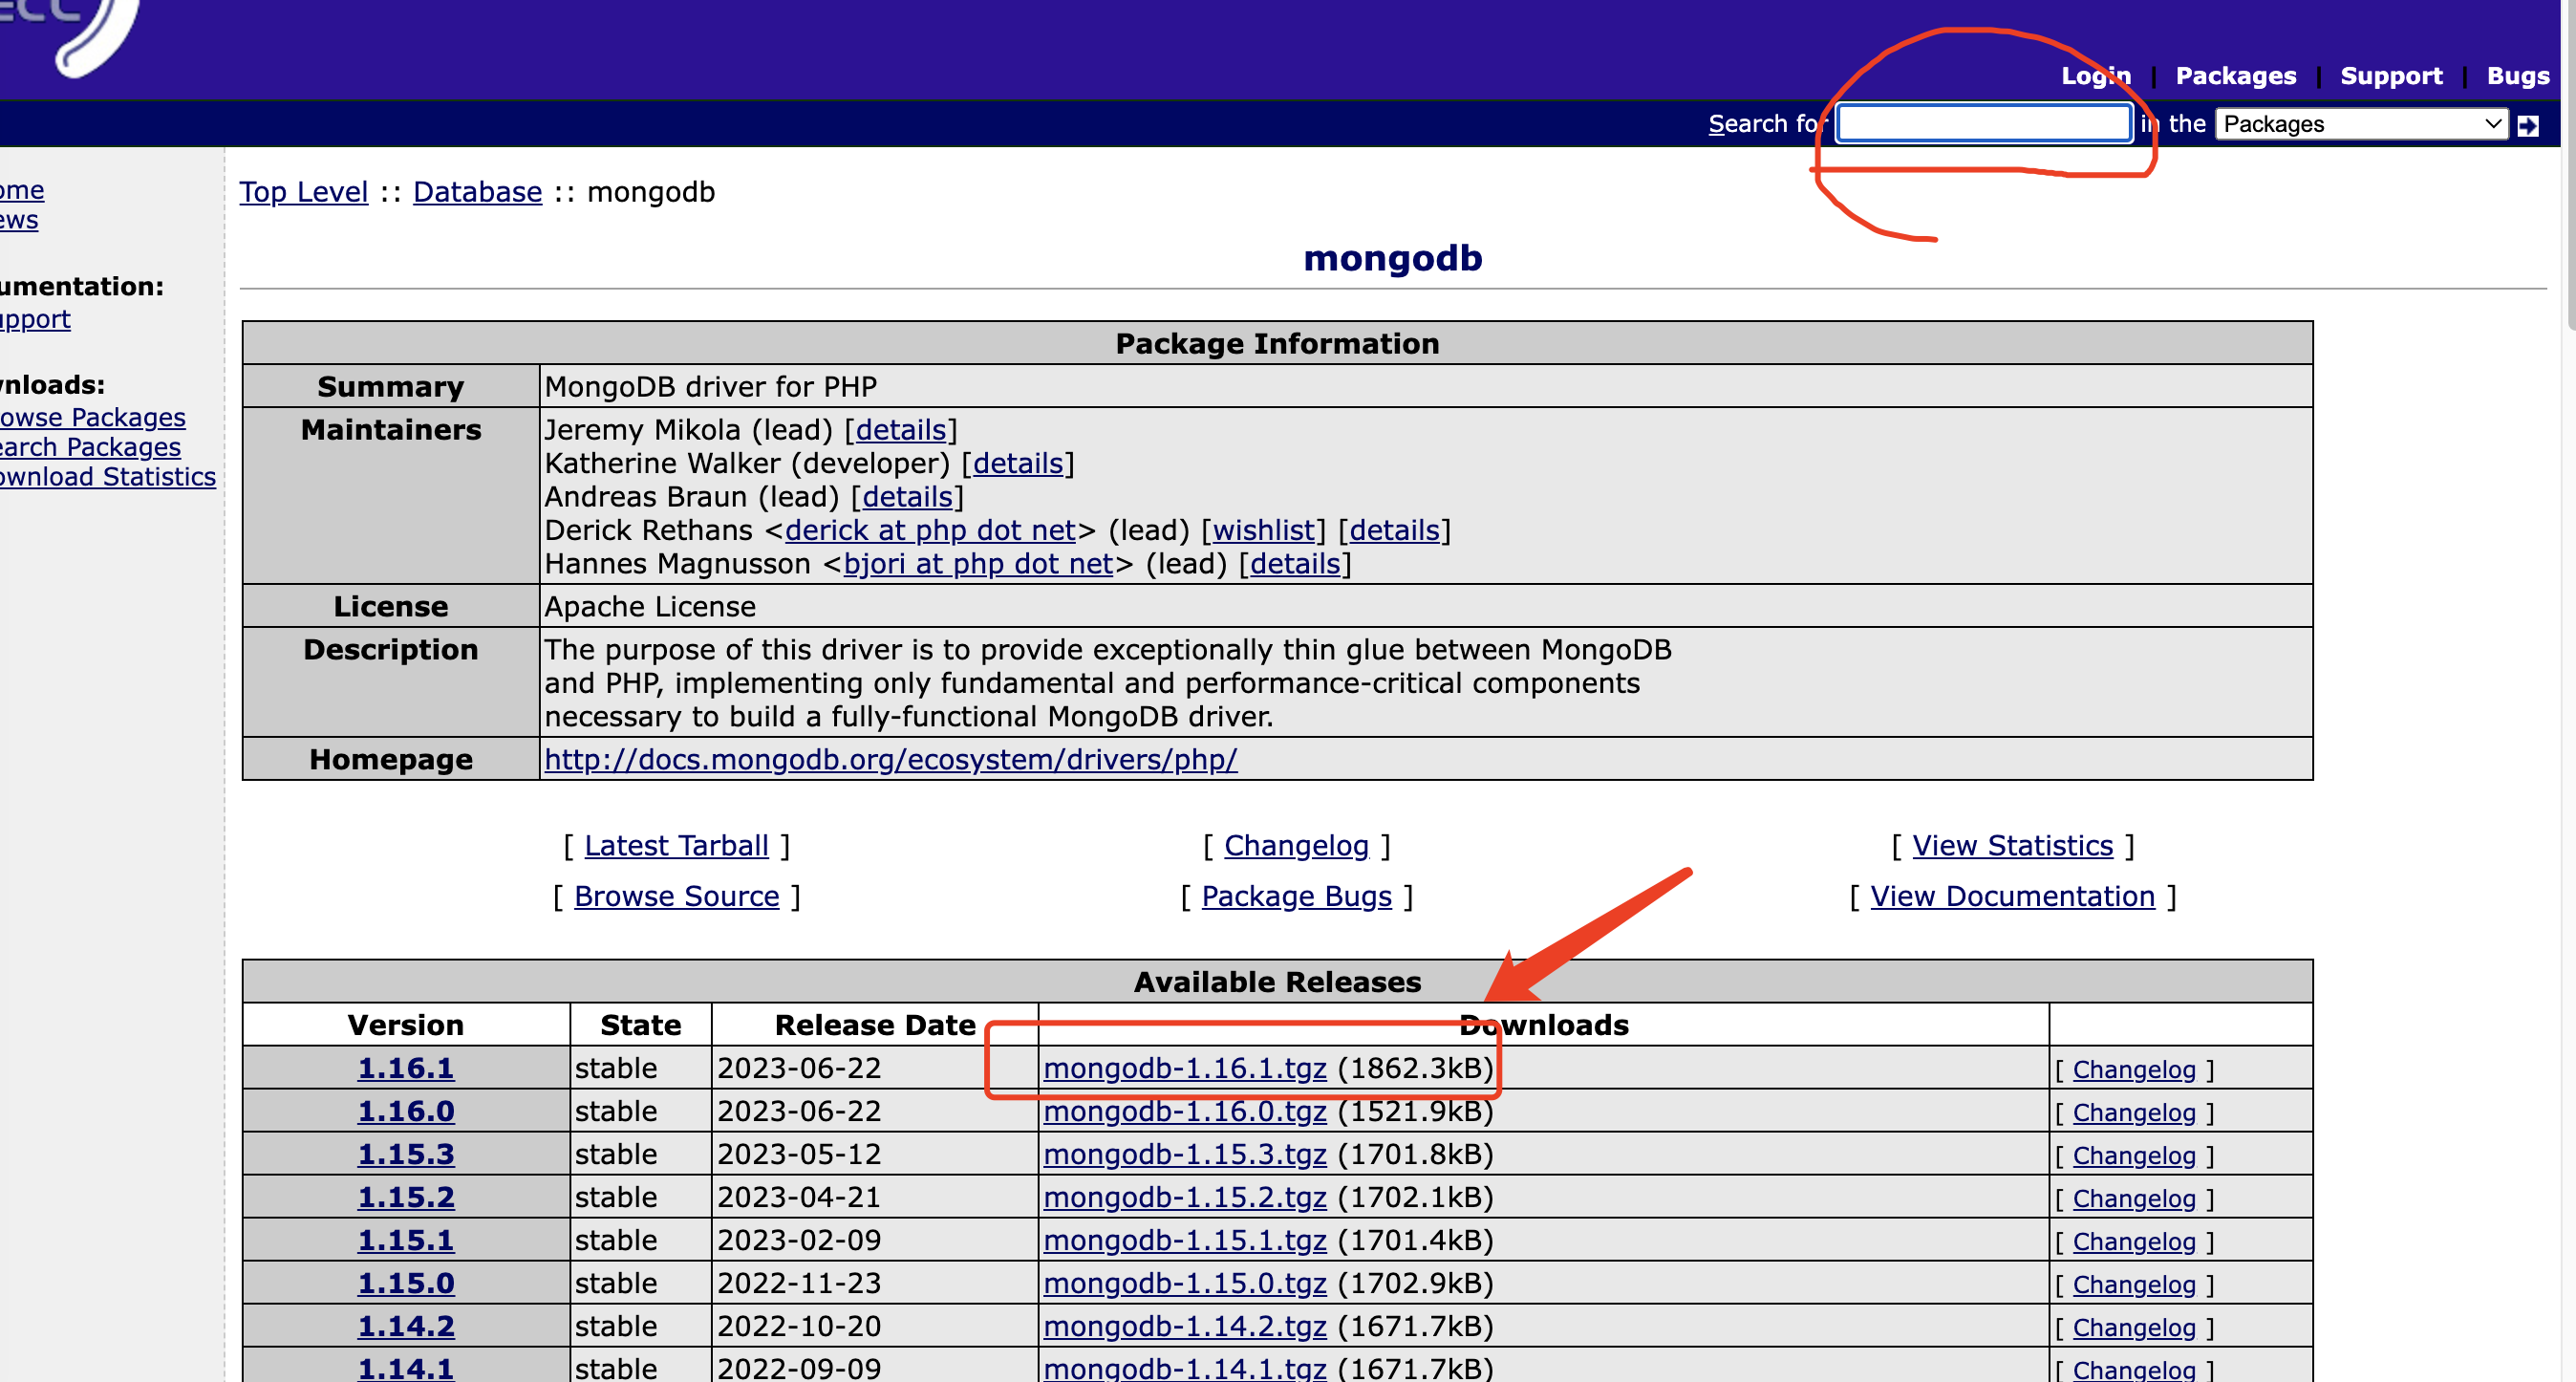
![PECL无法安装时手动编译安装PHP扩展]() PECL无法安装时手动编译安装PHP扩展 这里用mongodb举例1.手动下载mongodb扩展源码https://pecl.php.net/package/mongodb如需要下载其他扩展,在官网右上角搜索即可2.找个目录解压,进入到第二层文件夹目录(和package.xml同级目录)3.使用终端进入刚才这个目录cd /xxx/mongodb-1.16.1/mongodb-1.16.14.找到你要安装的对应PHP版本的phpize,如果是默认php版本可以使用which phpize查看路径,比如我需要安装php7.2版本的扩展,这里就是用我电脑上php7.2路径里的phpize,然后回车/Applications/MAMP/bin/php/php7.2.34/bin/phpize5.生成安装文件同上面一样,找到你要安装的对应PHP版本的php-config,找不到可以使用which php-config参考查看比如我电脑对应的路径为/Applications/MAMP/bin/php/php7.2.34/bin/php-config那我这一步我的执行命令就是./configure --with-php-config=/Applications/MAMP/bin/php/php7.2.34/bin/php-config等于后面路径为我的php-config文件存放路径6.编译扩展sudo make && make install编译出的扩展会自动保存到你php对应的目录下7.最后修改php.ini文件,加上对应扩展名称,重启PHP即可extension=mongodb.so8.完成
PECL无法安装时手动编译安装PHP扩展 这里用mongodb举例1.手动下载mongodb扩展源码https://pecl.php.net/package/mongodb如需要下载其他扩展,在官网右上角搜索即可2.找个目录解压,进入到第二层文件夹目录(和package.xml同级目录)3.使用终端进入刚才这个目录cd /xxx/mongodb-1.16.1/mongodb-1.16.14.找到你要安装的对应PHP版本的phpize,如果是默认php版本可以使用which phpize查看路径,比如我需要安装php7.2版本的扩展,这里就是用我电脑上php7.2路径里的phpize,然后回车/Applications/MAMP/bin/php/php7.2.34/bin/phpize5.生成安装文件同上面一样,找到你要安装的对应PHP版本的php-config,找不到可以使用which php-config参考查看比如我电脑对应的路径为/Applications/MAMP/bin/php/php7.2.34/bin/php-config那我这一步我的执行命令就是./configure --with-php-config=/Applications/MAMP/bin/php/php7.2.34/bin/php-config等于后面路径为我的php-config文件存放路径6.编译扩展sudo make && make install编译出的扩展会自动保存到你php对应的目录下7.最后修改php.ini文件,加上对应扩展名称,重启PHP即可extension=mongodb.so8.完成 -
![给Thinkphp3用上composer]() 给Thinkphp3用上composer 都2021年了,我不理解为什么还要使用TP3的项目修改系统构建时使用的是 thinkphp3.2.3,当时的框架并没有使用 composer 作为包管理器,第三方包统一放到了 ThinkPHP/Library/Vendor 目录下面。随着第三方包越来越多,单纯的使用 vendor() 加载扩展已经没法满足要求,所以记录下tp3使用composer的过程1. 项目根目录添加 composer.json{ "require": { "zircote/swagger-php": "^2.0", "giggsey/libphonenumber-for-php": "^8.12" }, "repositories": { "packagist": { "type": "composer", "url": "https://mirrors.aliyun.com/composer/" } } }2. 安装composer安装composer看这个:安装composer3. 安装依赖项目目录直接安装依赖包,自动生成 vendor 目录composer install4. 引入自动加载在原来的 thinphp 框架里 index.php 文件头部首行引入 vendor/autoload.php<?php header('Access-Control-Allow-Origin:*'); // 增加自动加载 require './vendor/autoload.php'; if(version_compare(PHP_VERSION,'5.3.0','<')) die('require PHP > 5.3.0 !'); define('APP_DEBUG',true); define('APP_PATH','./Application/'); define('RUNTIME_PATH','./Runtime/');define("TMPL_PATH","./tpl/"); define("UPLOAD_PATH","./Upload/"); 完成
给Thinkphp3用上composer 都2021年了,我不理解为什么还要使用TP3的项目修改系统构建时使用的是 thinkphp3.2.3,当时的框架并没有使用 composer 作为包管理器,第三方包统一放到了 ThinkPHP/Library/Vendor 目录下面。随着第三方包越来越多,单纯的使用 vendor() 加载扩展已经没法满足要求,所以记录下tp3使用composer的过程1. 项目根目录添加 composer.json{ "require": { "zircote/swagger-php": "^2.0", "giggsey/libphonenumber-for-php": "^8.12" }, "repositories": { "packagist": { "type": "composer", "url": "https://mirrors.aliyun.com/composer/" } } }2. 安装composer安装composer看这个:安装composer3. 安装依赖项目目录直接安装依赖包,自动生成 vendor 目录composer install4. 引入自动加载在原来的 thinphp 框架里 index.php 文件头部首行引入 vendor/autoload.php<?php header('Access-Control-Allow-Origin:*'); // 增加自动加载 require './vendor/autoload.php'; if(version_compare(PHP_VERSION,'5.3.0','<')) die('require PHP > 5.3.0 !'); define('APP_DEBUG',true); define('APP_PATH','./Application/'); define('RUNTIME_PATH','./Runtime/');define("TMPL_PATH","./tpl/"); define("UPLOAD_PATH","./Upload/"); 完成 -
![PHP一个简单字符串拼接签名的方法(Join)]() PHP一个简单字符串拼接签名的方法(Join) 经常有需求类似于:第一步:设所有发送或者接收到的数据为集合M,将集合M内非空参数值的参数按照参数名ASCII码从小到大排序(字典序),使用URL键值对的格式(即key1=value1&key2=value2…)拼接成字符串stringA。第二步:在stringA最后拼接上key得到stringSignTemp字符串,并对stringSignTemp进行MD5运算,再将得到的字符串所有字符转换为大写,得到sign值signValue。以往都是$k=$v&,最后再把末尾的&去掉,比较麻烦。无意间发现了有个join函数,用法如下:/** * 获取签名 * @param $params array 数组 * @return string 拼接后的字符串MD5 */ public function getSign($params) { ksort($params); $str = []; foreach ($params as $k => $v){ if (empty($v)) continue; $str[] = "{$k}={$v}"; } return strtoupper(md5(join('&',$str))); }
PHP一个简单字符串拼接签名的方法(Join) 经常有需求类似于:第一步:设所有发送或者接收到的数据为集合M,将集合M内非空参数值的参数按照参数名ASCII码从小到大排序(字典序),使用URL键值对的格式(即key1=value1&key2=value2…)拼接成字符串stringA。第二步:在stringA最后拼接上key得到stringSignTemp字符串,并对stringSignTemp进行MD5运算,再将得到的字符串所有字符转换为大写,得到sign值signValue。以往都是$k=$v&,最后再把末尾的&去掉,比较麻烦。无意间发现了有个join函数,用法如下:/** * 获取签名 * @param $params array 数组 * @return string 拼接后的字符串MD5 */ public function getSign($params) { ksort($params); $str = []; foreach ($params as $k => $v){ if (empty($v)) continue; $str[] = "{$k}={$v}"; } return strtoupper(md5(join('&',$str))); } -
![PHP使用mkdir创建目录后无法写入问题]()
-
![wkhtmltopdf中文不显示或者乱码问题]()
-
![简单的身份证号码计算方法]() 简单的身份证号码计算方法 function checkIDCard($idcard){ // 只能是18位 if(strlen($idcard)!=18){ return false; } // 取出本体码 $idcard_base = substr($idcard, 0, 17); // 取出校验码 $verify_code = substr($idcard, 17, 1); // 加权因子 $factor = array(7, 9, 10, 5, 8, 4, 2, 1, 6, 3, 7, 9, 10, 5, 8, 4, 2); // 校验码对应值 $verify_code_list = array('1', '0', 'X', '9', '8', '7', '6', '5', '4', '3', '2'); // 根据前17位计算校验码 $total = 0; for($i=0; $i<17; $i++){ $total += substr($idcard_base, $i, 1)*$factor[$i]; } // 取模 $mod = $total % 11; // 比较校验码 if($verify_code == $verify_code_list[$mod]){ return true; }else{ return false; } }
简单的身份证号码计算方法 function checkIDCard($idcard){ // 只能是18位 if(strlen($idcard)!=18){ return false; } // 取出本体码 $idcard_base = substr($idcard, 0, 17); // 取出校验码 $verify_code = substr($idcard, 17, 1); // 加权因子 $factor = array(7, 9, 10, 5, 8, 4, 2, 1, 6, 3, 7, 9, 10, 5, 8, 4, 2); // 校验码对应值 $verify_code_list = array('1', '0', 'X', '9', '8', '7', '6', '5', '4', '3', '2'); // 根据前17位计算校验码 $total = 0; for($i=0; $i<17; $i++){ $total += substr($idcard_base, $i, 1)*$factor[$i]; } // 取模 $mod = $total % 11; // 比较校验码 if($verify_code == $verify_code_list[$mod]){ return true; }else{ return false; } } -
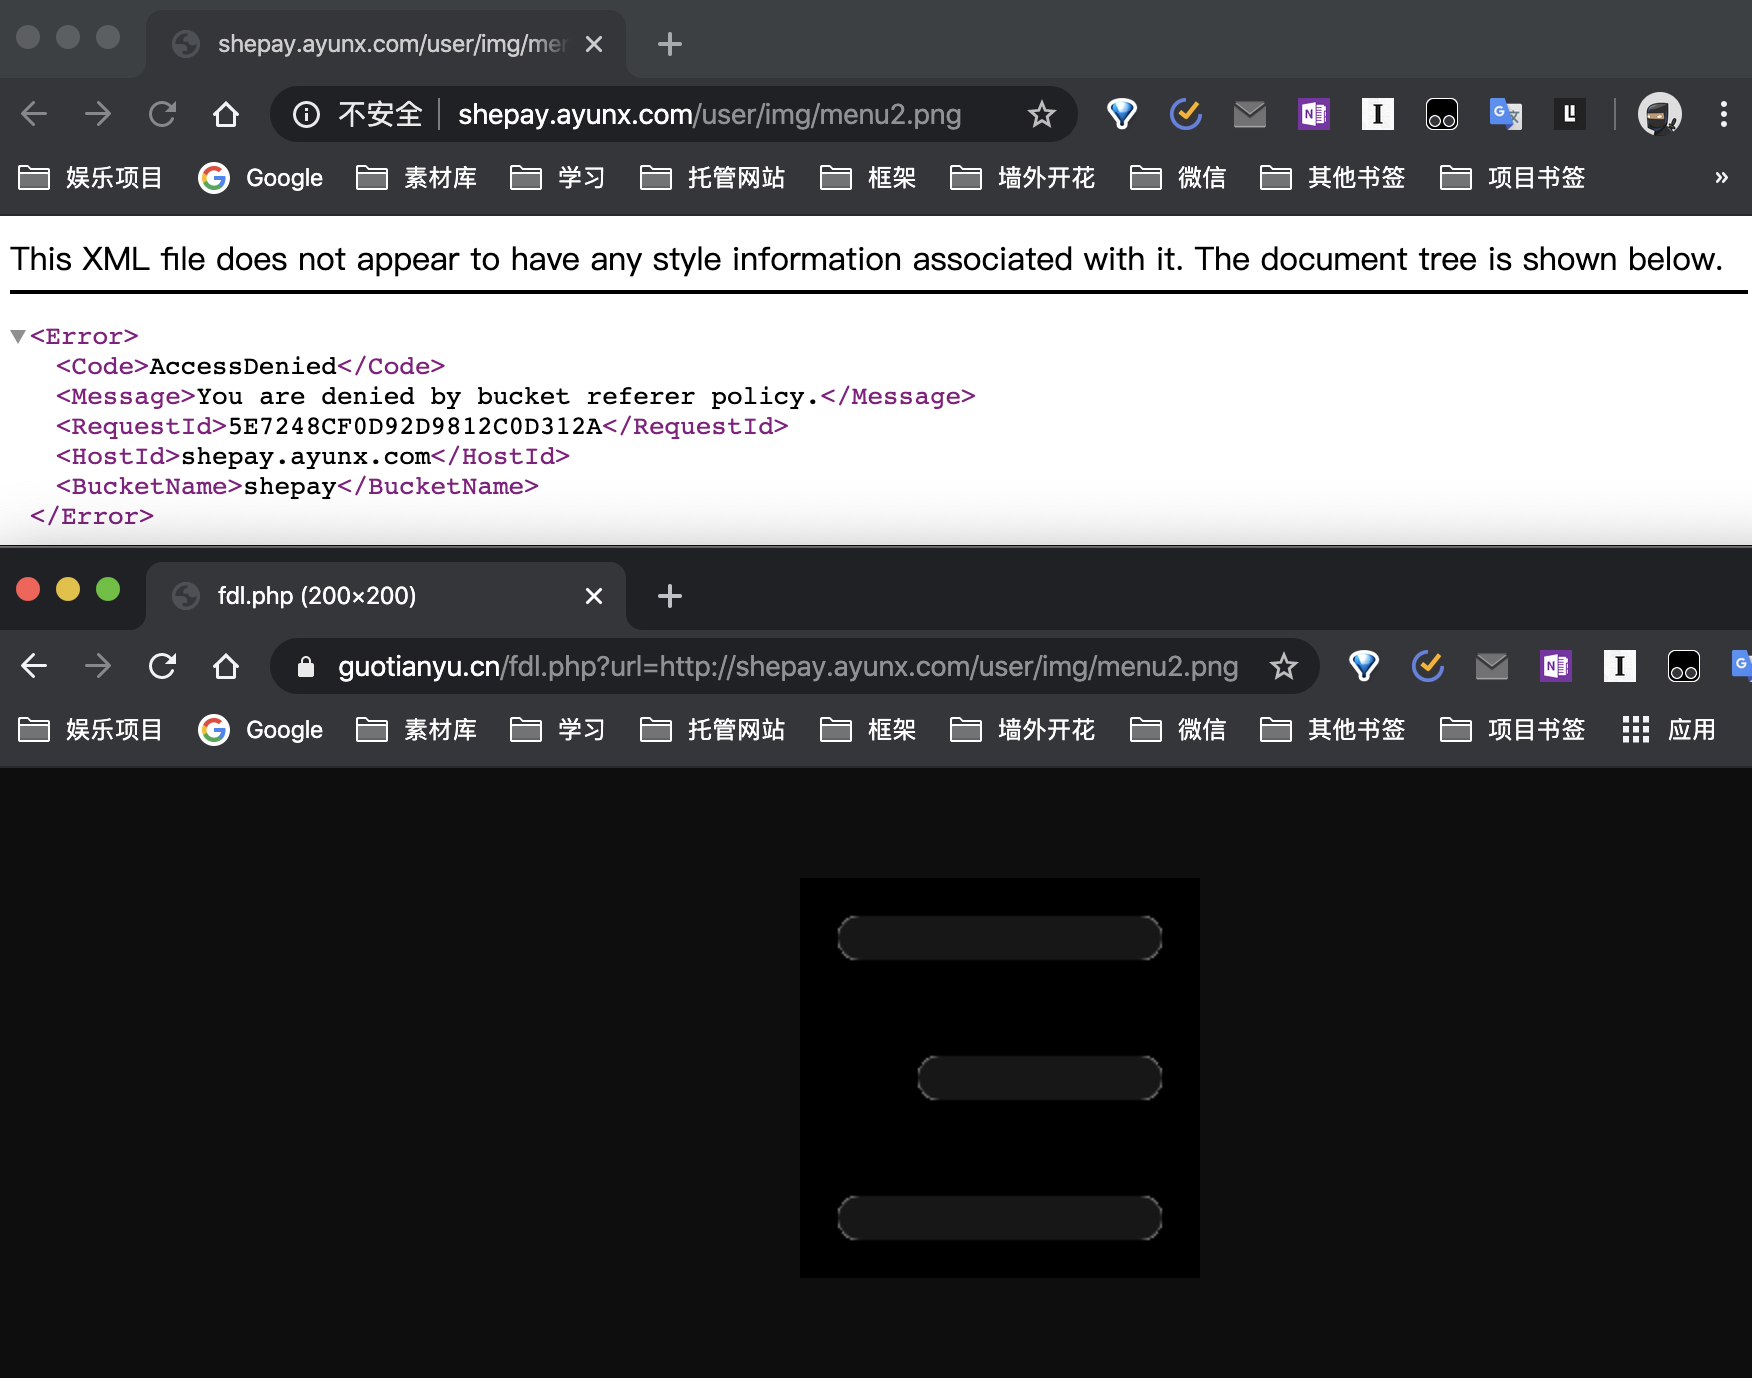
![如何越过阿里云 图片/文件 防盗链]() 如何越过阿里云 图片/文件 防盗链 403 AccessDenied前不久一套代码里的样式突然全掉了,看了下控制台发现 css/js 和 图片文件全都403了返回提示如下This XML file does not appear to have any style information associated with it. The document tree is shown below. <Error> <Code>AccessDenied</Code> <Message>You are denied by bucket referer policy.</Message> <RequestId>5E72380661ECA1559CCB04F6</RequestId> <HostId>shepay.xxxx.com</HostId> <BucketName>shepay</BucketName> </Error>看了下是阿里云的CDN,拒绝访问了,联系不到CDN的主人,甚至也来不及保存到本地了,相当难受。怎么办于是网上搜寻解决办法,发现并没有很多比较详细的提到如何绕过防盗链的,我真的只是想保存到本地而已~~后来在一位老哥这里看到了相关的功能,但是实测了下可以部分绕过防盗链,但是只限于图片格式,而我需要的不仅仅是图片,还要有文件格式。于是根据这位老哥的方法,做了修改和完善,图片和文字通过不同方式直接展示到浏览器,然后Command + S保存即可。测试调用方式如下(链接随时可能失效,仅供演示):https://guotianyu.cn/fdl.php?url= 要绕过防盗链的文件/图片链接如https://guotianyu.cn/fdl.php?url=http://shepay.ayunx.com/user/js/popper.min.js图片效果演示(上面是防盗链链接,下面是绕过防盗链的链接):文字效果演示:就当长个教训吧,特异性文件以后一定不放别人的CDN上...当然啦,不经许可使用即为盗,这种方法还是适合应急用,这里还是不鼓励这种行为啦~代码实现最后附上修改后的代码:<?php class ImgBridge{ private $water=''; private $imgUrl=''; private $referer=''; private $ua='MQQBrowser/26 Mozilla/5.0 (Linux; U; Android 2.3.7; zh-cn; MB200 Build/GRJ22; CyanogenMod-7) AppleWebKit/533.1 (KHTML, like Gecko) Version/4.0 Mobile Safari/533.1'; private $imgCode=''; private $imgHeader=''; private $imgBody=''; private $imgType=''; private $response = ''; public function __construct($config=array()){ foreach($config as $key=>$value){ $this->$key=$value; } } public function getImg($imgUrl){ $this->imgUrl=$imgUrl; /*\* 处理url \*/ if(substr($this->imgUrl,0,7)!=='http://' && substr($this->imgUrl,0,8)!=='https://'){ $this->imgUrl='http://'.$this->imgUrl; } /*\* 解析url中的host \*/ $url_array=parse_url($this->imgUrl); /*\* 设置referer \*/ $this->referer=$this->referer==""?'http://'.$url_array['host']:$this->referer; /*\*开始获取 \*/ $this->urlOpen(); $this->imgBody; /*\*处理错误 \*/ if($this->imgCode!=200){ $this->error(1); exit(); } /*\*获取图片格式 \*/ preg_match("/Content-Type: image\/(.+?)\\n/sim",$this->imgHeader,$result); /*\*看看是不是图片 \*/ if(!isset($result[1])){ // 如果不是图片就输出成文件 echo $this->response; // 也可以选择保存成文件,直接重命名即可使用 //file_put_contents('./test.txt',$this->response);die(); die(); $this->error(2); exit(); }else{ $this->imgType=$result[1]; } /*\* 输出内容 \*/ $this->out(); } private function out(){ /*\* gif 不处理,直接出图 \*/ if($this->imgType=='gif'){ header("Content-Type: image/gif"); echo $this->imgBody; exit(); } header("Content-Type: image/png"); /*\* 其他类型的,加水印 \*/ $im=imagecreatefromstring($this->imgBody); $white = imagecolorallocate($im, 255, 255, 255); /*加上水印\*/ if($this->water){ imagettftext($im, 12, 0, 20, 20, $white, "/fonts/hwxh.ttf", $this->water); } imagepng($im); } private function error($err){ header("Content-Type: image/jpeg"); $im=imagecreatefromstring(file_get_contents('./default.jpg')); imagejpeg($im); } private function urlOpen() { $ch = curl_init(); curl_setopt($ch, CURLOPT_URL, $this->imgUrl); curl_setopt($ch, CURLOPT_USERAGENT, $this->ua); curl_setopt ($ch,CURLOPT_REFERER,$this->referer); curl_setopt($ch, CURLOPT_RETURNTRANSFER, 1); curl_setopt($ch, CURLOPT_HEADER, 1); /*\*跳转也要 \*/ curl_setopt($ch, CURLOPT_FOLLOWLOCATION, true); /*\* 支持https \*/ $opt[CURLOPT_SSL_VERIFYHOST] = 2; $opt[CURLOPT_SSL_VERIFYPEER] = FALSE; curl_setopt_array($ch, $opt); $response = curl_exec($ch); $this->response = $response; $this->imgCode=curl_getinfo($ch, CURLINFO_HTTP_CODE) ; if ($this->imgCode == '200') { $headerSize = curl_getinfo($ch, CURLINFO_HEADER_SIZE); $this->imgHeader = substr($response, 0, $headerSize); $this->imgBody = substr($response, $headerSize); $this->response = $this->imgBody; return ; } curl_close($ch); } private function download() { ob_start(); $filename='down.txt'; $title=substr($filename,strrpos($filename,'/')+1); //$size=readfile($filename); //var_dump($size);exit; Header( "Content-type:application/octet-stream"); Header( "Accept-Ranges:bytes"); Header( "Accept-Length:"); header( "Content-Disposition: attachment; filename= $title"); //echo file_get_contents($size); exit; } } $img=new ImgBridge(array('water'=>'')); $img->getImg(strstr($_SERVER["QUERY_STRING"], "http"));
如何越过阿里云 图片/文件 防盗链 403 AccessDenied前不久一套代码里的样式突然全掉了,看了下控制台发现 css/js 和 图片文件全都403了返回提示如下This XML file does not appear to have any style information associated with it. The document tree is shown below. <Error> <Code>AccessDenied</Code> <Message>You are denied by bucket referer policy.</Message> <RequestId>5E72380661ECA1559CCB04F6</RequestId> <HostId>shepay.xxxx.com</HostId> <BucketName>shepay</BucketName> </Error>看了下是阿里云的CDN,拒绝访问了,联系不到CDN的主人,甚至也来不及保存到本地了,相当难受。怎么办于是网上搜寻解决办法,发现并没有很多比较详细的提到如何绕过防盗链的,我真的只是想保存到本地而已~~后来在一位老哥这里看到了相关的功能,但是实测了下可以部分绕过防盗链,但是只限于图片格式,而我需要的不仅仅是图片,还要有文件格式。于是根据这位老哥的方法,做了修改和完善,图片和文字通过不同方式直接展示到浏览器,然后Command + S保存即可。测试调用方式如下(链接随时可能失效,仅供演示):https://guotianyu.cn/fdl.php?url= 要绕过防盗链的文件/图片链接如https://guotianyu.cn/fdl.php?url=http://shepay.ayunx.com/user/js/popper.min.js图片效果演示(上面是防盗链链接,下面是绕过防盗链的链接):文字效果演示:就当长个教训吧,特异性文件以后一定不放别人的CDN上...当然啦,不经许可使用即为盗,这种方法还是适合应急用,这里还是不鼓励这种行为啦~代码实现最后附上修改后的代码:<?php class ImgBridge{ private $water=''; private $imgUrl=''; private $referer=''; private $ua='MQQBrowser/26 Mozilla/5.0 (Linux; U; Android 2.3.7; zh-cn; MB200 Build/GRJ22; CyanogenMod-7) AppleWebKit/533.1 (KHTML, like Gecko) Version/4.0 Mobile Safari/533.1'; private $imgCode=''; private $imgHeader=''; private $imgBody=''; private $imgType=''; private $response = ''; public function __construct($config=array()){ foreach($config as $key=>$value){ $this->$key=$value; } } public function getImg($imgUrl){ $this->imgUrl=$imgUrl; /*\* 处理url \*/ if(substr($this->imgUrl,0,7)!=='http://' && substr($this->imgUrl,0,8)!=='https://'){ $this->imgUrl='http://'.$this->imgUrl; } /*\* 解析url中的host \*/ $url_array=parse_url($this->imgUrl); /*\* 设置referer \*/ $this->referer=$this->referer==""?'http://'.$url_array['host']:$this->referer; /*\*开始获取 \*/ $this->urlOpen(); $this->imgBody; /*\*处理错误 \*/ if($this->imgCode!=200){ $this->error(1); exit(); } /*\*获取图片格式 \*/ preg_match("/Content-Type: image\/(.+?)\\n/sim",$this->imgHeader,$result); /*\*看看是不是图片 \*/ if(!isset($result[1])){ // 如果不是图片就输出成文件 echo $this->response; // 也可以选择保存成文件,直接重命名即可使用 //file_put_contents('./test.txt',$this->response);die(); die(); $this->error(2); exit(); }else{ $this->imgType=$result[1]; } /*\* 输出内容 \*/ $this->out(); } private function out(){ /*\* gif 不处理,直接出图 \*/ if($this->imgType=='gif'){ header("Content-Type: image/gif"); echo $this->imgBody; exit(); } header("Content-Type: image/png"); /*\* 其他类型的,加水印 \*/ $im=imagecreatefromstring($this->imgBody); $white = imagecolorallocate($im, 255, 255, 255); /*加上水印\*/ if($this->water){ imagettftext($im, 12, 0, 20, 20, $white, "/fonts/hwxh.ttf", $this->water); } imagepng($im); } private function error($err){ header("Content-Type: image/jpeg"); $im=imagecreatefromstring(file_get_contents('./default.jpg')); imagejpeg($im); } private function urlOpen() { $ch = curl_init(); curl_setopt($ch, CURLOPT_URL, $this->imgUrl); curl_setopt($ch, CURLOPT_USERAGENT, $this->ua); curl_setopt ($ch,CURLOPT_REFERER,$this->referer); curl_setopt($ch, CURLOPT_RETURNTRANSFER, 1); curl_setopt($ch, CURLOPT_HEADER, 1); /*\*跳转也要 \*/ curl_setopt($ch, CURLOPT_FOLLOWLOCATION, true); /*\* 支持https \*/ $opt[CURLOPT_SSL_VERIFYHOST] = 2; $opt[CURLOPT_SSL_VERIFYPEER] = FALSE; curl_setopt_array($ch, $opt); $response = curl_exec($ch); $this->response = $response; $this->imgCode=curl_getinfo($ch, CURLINFO_HTTP_CODE) ; if ($this->imgCode == '200') { $headerSize = curl_getinfo($ch, CURLINFO_HEADER_SIZE); $this->imgHeader = substr($response, 0, $headerSize); $this->imgBody = substr($response, $headerSize); $this->response = $this->imgBody; return ; } curl_close($ch); } private function download() { ob_start(); $filename='down.txt'; $title=substr($filename,strrpos($filename,'/')+1); //$size=readfile($filename); //var_dump($size);exit; Header( "Content-type:application/octet-stream"); Header( "Accept-Ranges:bytes"); Header( "Accept-Length:"); header( "Content-Disposition: attachment; filename= $title"); //echo file_get_contents($size); exit; } } $img=new ImgBridge(array('water'=>'')); $img->getImg(strstr($_SERVER["QUERY_STRING"], "http"));